
Pressure Testing of Piping Systems
Hydro testing is conducted as a pre-commissioning activity after completion of piping construction. We have identified four main considerations for the hydro testing process.
A- How to do hydro testing on a piping system?
B- What equipment is to be used for hydro testing?
C- How many personnel are required for hydro testing?
D- What is the water quality of the hydro test?
A- How to do hydro testing on a piping system?
Hydrostatic testing, commonly known as hydro testing, is a process used to verify the integrity and strength of a piping system by subjecting it to water pressure. Here's an overview of the hydro test activity on a piping system:
Preparation Phase:
Review Test Specifications:
The test specifications, including pressure requirements, duration of the test, and acceptance criteria, are reviewed to ensure compliance.
Select Test Sections:
Determine the sections of the piping system to be tested, considering factors such as accessibility, complexity, and criticality.
Install Test Plugs/End Caps:
Seal the ends of the selected piping sections using appropriate test plugs (adding blind flange, valve isolation, etc.) or end caps to contain the test water.
Connect Test Equipment:
Set up the pressure pump, pressure gauges, manifold, hoses, and other test equipment according to the test plan.
Fill the Piping System:
Fill the piping with water using a dedicated fill pump or connected water source until it's completely filled and free of air pockets. You can check the line by the vents for air pockets.

Testing Phase:
Pressure Application:
Gradually increase the water pressure within the pipeline to the specified test pressure, typically at a rate specified in the test procedure.
Pressure Stabilization:
Hold the test pressure for the designated duration, allowing sufficient time for the system to stabilize and for any potential leaks to manifest.
Pressure Monitoring:
Continuously monitor the pressure readings using pressure gauges and record them regularly throughout the test.
Visual Inspection:
Inspect the exterior of the piping system for signs of leakage, bulging, or other abnormalities that may indicate a failure.

Post-Test Phase:
Pressure Release:
Using the pressure pump, gradually reduce the pressure in the line to atmospheric levels while ensuring a controlled release of water.
Drainage:
Drain the test water from the line using drain valves, ensuring complete removal to prevent water damage or corrosion.
Inspection and Evaluation:
Inspect the interior of the piping system for signs of leakage, corrosion, or other defects that may have been revealed during the test.
Documentation:
Document the test results, including pressure readings, observations, any identified issues, and the overall outcome of the test.
Reporting and Acceptance:
Prepare a comprehensive test report summarizing the test procedures, results, and any remedial actions taken. Obtain acceptance from relevant stakeholders based on the test findings.
Conclusion:
Hydro testing is a critical quality assurance measure to ensure the safety and reliability of piping systems in various industries, including oil and gas, petrochemical, power generation, and water treatment. Proper planning, execution, and documentation of hydro tests are essential for validating the integrity of piping systems and mitigating the risk of potential failures during operation.

B- What is the list of piping hydro test equipment?
The pressure testing equipment for pipe hydro testing activity typically includes the following:
Pressure Pump:
Used to generate the required pressure in the pipeline. It can be manually operated or powered by electricity or an engine.
Pressure Gauges:
Essential for monitoring and recording the pressure within the pipeline during the test. Ensure gauges are calibrated and suitable for the test pressure range.
Test Plugs/End Caps:
Used to seal the ends of the pipe section being tested. They must be capable of withstanding the test pressure. These can be blind flanges, valves (in closed position) or plugs.

Blind Flange For End Caping
Manifold:
A device that connects multiple gauges, relief valves, and other instruments to the pipeline. It helps in distributing the pressure evenly.
Relief Valve:
A safety device to prevent over-pressurization by automatically releasing excess pressure if it exceeds a predetermined level.
Fill Pump/Water Source:
Used to fill the pipeline with water before pressurizing. The source can be a dedicated fill pump or a connected water supply.
Drain Valves:
Allow the controlled release of water from the pipeline after testing is complete.
Hoses and Connectors:
High-pressure hoses and connectors to link the pressure pump, manifold, and pipeline securely.
Recorder/Chart Recorder:
For continuous pressure recording over time, provide a visual and documented record of the test.
Safety:
All personnel involved in the testing must wear personal protective equipment (PPE) such as hard hats, safety glasses, gloves, and hearing protection.
This equipment ensures the hydro testing process is conducted safely, accurately, and efficiently.
The area is to be barricaded, and safety signs should be implemented, especially around the flanged joints. Unauthorized personnel can not pass the barriers.
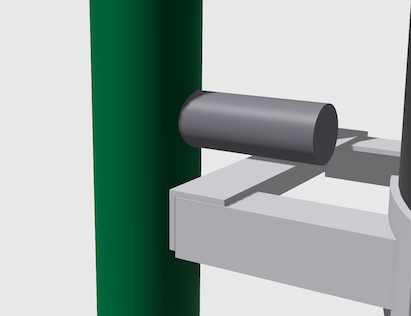
Whip checks must be used for the high-pressure hose connections to prevent possible bursting.
All the components (Flange, bolt, gasket, valve, hoses, etc.) must be rated appropriately.
Gauges must be calibrated.


C- How Many Personnel are Required for Hydro Testing?
The number of personnel required for hydro testing can vary depending on the size and complexity of the pipeline system, the testing procedures, and safety requirements. However, a typical hydro testing team might include the following roles:
Test Supervisor/Engineer:
Oversees the entire hydro testing process, ensures compliance with procedures and safety standards, and addresses any issues that arise.
Pump Operator:
Manages the operation of the pressure pump, including starting, monitoring, and stopping the pump as needed.
Gauge Reader/Recorder:
Monitors and records the pressure readings throughout the test, ensuring accuracy and compliance with test requirements.
Safety Officer:
Ensures all safety protocols are followed, monitors the site for potential hazards, and is prepared to respond to emergencies.
Pipe Fitters/Technicians:
Responsible for installing and removing test plugs/end caps, connecting and disconnecting hoses, and assisting with filling and draining the pipeline.
Support Personnel/Laborers:
Assist with general tasks such as moving equipment, handling water hoses, and providing additional manpower as needed.
Communications Coordinator:
Manages communications between team members, especially if the test site is extensive and requires coordination over long distances.
Typical Team Size
For small to medium-sized projects, a team of 5 to 8 personnel is generally sufficient:
1 Test Supervisor/Engineer
1 Pump Operator
1-2 Gauge Readers/Recorders
1 Safety Officer
2-3 Pipe Fitters/Technicians
For larger projects or more complex systems, the team size might increase to 10 or more personnel to ensure all aspects of the test are adequately covered.
The specific number of personnel needed for the hydro test will depend on the requirements such as the length and diameter of the pipeline, testing pressures, and logistical challenges of the site. A well-coordinated team is essential to conduct the test safely and effectively.


D- What is the water quality of the hydro test?
The water quality used for hydrostatic testing is crucial to ensure accurate results and prevent damage to the piping system. Here are the key considerations for water quality in hydro testing:
1. Cleanliness:
The water used should be clean and free from debris, sediments, oils, or other contaminants that could obstruct pipes, valves, or instruments.
Filtration may be necessary to remove any particles that could cause blockages or damage equipment during testing.
2. Corrosion Inhibition:
Water should be treated or supplemented with corrosion inhibitors to prevent corrosion of the piping system during testing.
Corrosion inhibitors help protect the internal surfaces of the pipes from oxidation, which could compromise the integrity of the system.
3. Temperature Control:
Water temperature can affect the behavior of materials and joints in the piping system, so it's essential to control the temperature within acceptable limits.
Ideally, the test water temperature should be close to ambient temperature to minimize thermal expansion or contraction effects.
4. pH Level:
The pH level of the test water should be within a neutral range (typically around pH 7) to avoid potential reactions with the materials of the piping system.
Extreme pH levels can corrode metal surfaces or cause scaling, leading to inaccurate test results or damage to the system.
5. Chlorine Content:
Chlorine, if present in the water, should be at minimal levels to prevent corrosion of metallic components.
Excessive chlorine content can accelerate corrosion and compromise the integrity of the piping system.
6. Oxygen Content:
The water should be deaerated or degassed to remove dissolved oxygen, as oxygen can promote corrosion in metallic piping systems.
Minimizing oxygen content helps maintain the integrity of the pipes and prevents corrosion-related issues during testing.
Conclusion:
Maintaining appropriate water quality is essential for the success of hydrostatic testing. It ensures accurate results, prevents damage to the piping system, and prolongs the service life of the infrastructure. By adhering to water quality standards and best practices, engineers can conduct hydro tests with confidence and reliability.
This blog is intended as a guide to determining the minimum safe spacing of plants and equipment in Oil Refineries, Petrochemical Complexes, and similar installations.
The spacing recommendations will apply in the absence of Clients' standards or supplement such standards where necessary. They are based on current industry practice.
The spacing recommendations aim to ensure that available plot areas are used economically without affecting personnel safety or plant vulnerability.